Sunday, July 6, 2014

Craft | Fish Handprint Craft for Daddy


My husband loves to fish.
In fact he has a shirt that says,
"You don't fish? I see no point in talking to you."

So when I came across this idea for Father's Day on Pinterest, I had to take a crack at it myself!

Although, as cute as hers was . . . I think mine is cuter.
But I'm a little partial to the hands that made it.

I honestly was going to use a square canvas when I started thinking about making this.
But something just didn't sit right with me.
Handprint craft for me?  Sure, canvas would work!
But that's not really my husband's kind of thing.

So, I took a trip down the "wood-crafting" isle at Hobby Lobby and as soon as I saw it, I knew it would be perfect!  It cost about $12 for the size I chose (I used my 40% email coupon on it!).  You can also buy these on Amazon.  Which I did, for another project.  However, I prefer going to Hobby Lobby for it because you can choose exactly the size and shape you desire.

I also decided to use acrylic paints.  I'm most fond of those.
My 4-year-old helped me paint the blue.
I added the sun.
Then I painted their hands orange and ever so carefully laid them down!


Once we made it through that part . . . the rest of the details were on me!

I painted the bobber first, then used a thin paint marker for the fishing line and hook, their names and ages, and to dot the year into the sun.
Then I added eyes with a fat paint marker.
I also had my older son try putting finger-print lips on the fish, before I let the younger do it!


Lastly, I had the younger son do his fingerprint lips and I stenciled "Hooked On Daddy".
(I had bought a stencil from Hobby Lobby as well.)
I tried a few techniques on a scrap piece of paper first.
I found that using my sponge brush and black (acrylic) paint, I could lay the stencil down and just dab it.  But I could only do one letter at a time, and just wait until it dried before I did the next.
It took awhile, but it wasn't too bad.
The results are worth it. :-)

Wednesday, July 2, 2014

Cook | Easy Mexican Rice

I discovered this recipe a few years ago.  
Ever since then, I don't buy the "Spanish" or "Mexican" box mixes anymore.
In fact, I don't even use Instant Rice anymore either.
It just tastes too mushy to me now.
This is good with white or brown long-cooking rice!
Brown rice just takes a little longer.

I got an enameled cast-iron dutch oven for Christmas several years ago from my mother-in-law.  
And I had no idea what I would cook in it.
My mom had never used one of these.
So I began looking up recipes for dutch ovens.
I tried a few, some with success and some that I'd rather not relive.
Then I discovered that it was not some ancient piece of cookware that needed special recipes.
Since that realization, I've used it a lot more.
For many different recipes.
One of my favorites to make in it is this Easy Mexican Rice!
(And chicken and noodles!)


Easy Mexican Rice

1 1/2 C Long-Cooking Rice - white or brown

1 C Salsa
       (I prefer the chunkier style!)

2 C Chicken Broth

**You can also add a can of black beans (drained and rinsed), if desired, at the end of cooking**


Directions:
1)  Combine all the ingredients in the dutch oven. 
         (I have also sauteed half an onion in a little oil prior to adding rice, then sauteed the rice a little, and then added in the other ingredients. I'm not sure it made much of a difference to me though.)


2)  Bring to a boil, stirring occasionally.


3)  Reduce heat to low and cover.  Allow to simmer for 20-25 minutes, stirring occasionally.

4)  At the end, you may want to add a little more chicken broth if it becomes too dry.  You can also stir in a can of black beans (drained and rinsed!) if desired.


I love to serve this alongside tacos, enchiladas, or even fish with mango salsa! YUMMY!


Fish with Mango Salsa:


Cook | "Skinny" Chicken Enchiladas

Chicken Enchiladas have sounded really good to me lately.
I started my search of enchilada recipes on Google - which lead me to several different popular recipe sites - and, of course, I checked Pinterest.
I wanted to use corn tortillas. 
That was my "must" because I had them on hand, and they are supposedly a better alternative to flour tortillas (which I figure equals the "evil" white bread when you are trying for something "healthy").
Don't get me wrong, we eat white bread too! Especially when it's homemade!!
Also, I didn't want to make my own sauce this particular time...although making it from scratch can be very, very rewarding... I searched for a recipe that also used canned enchilada sauce.
I found one that seemed to come pretty close to what I was looking for:
 Quick and Easy Enchiladas on About.com.
I don't seem to have the ability to follow directions... so I added my own flair!
Basically, you can make it "skinnier" or "fatter", especially depending on how much cheese, sour cream, or other toppings you add!
Pile on the lettuce, tomatoes, black olives, and salsa for best results! :)
It turns out pretty good!


You really can make this as simple or complicated as you'd like...

"Skinny" Chicken Enchiladas

1 1/2 to 2 C Cooked, Shredded Chicken Breasts
          (I used my Crockpot Mexican Chicken recipe, which results in flavorful, moist chicken!)
          (You could also use canned chicken! Or just poach or bake some!)

1 28-oz (Lg) Can of Red Enchilada Sauce    

12 Small Corn Tortillas - You could use flour tortillas if preferred though!! 
         (more or less, depending on how much filling you put in)

Oil 
          (You can spray, like I did, or brush on)

1-2 C Shredded Cheese - I used cheddar, but you could use Colby-jack, mozzarella, queso blanco, etc
          (again, more or less depending on how much you want to use!)


Directions:
1) (This step CAN be skipped, but I promise it's better this way!)
     Heat oven to 500.  Spray or brush oil onto both sides of each tortilla.  Lay them on a cookie sheet.  Bake for 7-8 minutes, flipping once halfway through.  Allow to cool to where you can hold them.


2)  Turn oven down to 400.


3)  Put your shredded chicken in a bowl.  If you use the Crockpot Mexican Chicken, you don't need to add anything else.  IF you use canned or plain, cooked chicken, stir in 1/2 C of the enchilada sauce.


4)  Pour some enchilada sauce in the bottom of a 9x13 baking dish - enough to cover it.


5)  Set up your assembly station: tortillas, chicken, and cheese!  Take one tortilla and put a spoonful of the chicken down the middle.  IF you want to, sprinkle on a little cheese.  Then roll both sides over the middle and place seam side down in the baking dish.


6)  When all the tortillas are filled and in the pan, pour the rest of the enchilada sauce over the tortillas.  Then you can sprinkle on a little more cheese (if desired!).


7)  Bake at 400 for 15 minutes...or until the cheese is melted and the dish is warmed through!


8)  I love to serve this over Easy Mexican Rice with black beans! Yummy!!


Let me know if this becomes one of your "regulars" too OR what changes you make!!

Tuesday, July 1, 2014

Cook | Crockpot Mexican Chicken

I've used several variations of this recipe in the past few years. 
I like this one when I want a very basic recipe for flavorful chicken that I can use with tacos, burritos, enchiladas, and other dishes.
It's super simple and speedy.

Crockpot Mexican Chicken

3-4 Frozen, Individual Chicken Breasts
          (I used 4 large breasts in my recipe - I was making for enchiladas, and had some left-over that I plan to use for another meal later in the week)

1/4 C Salsa

1 can Cheddar Cheese Soup
          (I used the Fiesta Nacho Cheese this time because I wanted a little kick.  You could also add 1-2 Tbsp of taco seasoning to achieve extra spice/flavor.)


Directions:
1) Mix 1/4 cup salsa with the can of cheese soup.

2) Put chicken breasts in the crockpot and pour the salsa-cheese mixture over it.

3) Easiest part! Put the lid on and cook on low all-day (I like to use the frozen breasts when it's all-day, usually 8-9 hours).  If you use fresh chicken, you could could easily cook 6-7 hours.  If you cook on high, it cuts the time in half to 3-4 hours. 

4) Shred and you can add in and use as much or as little of the cheesy-salsa broth as you need or desire!


Like I mentioned above, I like to use this for tacos OR Chicken Enchiladas!


Let me know if this becomes one of your "regulars" too OR what changes you make!!

Craft | Just in Time for 4th of July


As usual, I originally saw this idea on Pinterest.
I'm not ashamed to admit it.  Great stuff comes from Pinterest!
I thought, simple enough and it'll be cheap too!

I went on Amazon and ordered the cheapest wire wreath  (it was an add-on item, 12-inches around, and green....in retrospect, I probably should have gotten a bigger one of either 16" or 18" and paid a little more), three bags of wooden clothespins (for my 12", I only needed 1 & 1/2 bags), and a bag of different-sized wooden stars.  
I already had some red, white, and blue acrylic paints from previous projects.

Prior to painting, I had to figure out how many I wanted of each color!
I decided I wanted to have 7 red and 6 white sections or "stripes" - to be accurate!
So, I put some of the clothespins on two or three sections of my wire wreath and did some math calculations (including division and multiplication!) to figure it all out.


At first I started painting the clothespins while still together.


But then I discovered that it was too difficult to paint the inside, without taking them apart.

So for the red and white, I started by taking them apart and painting was quicker!


I also had to paint my wire wreath ... two coats!

I really had to cram the clothespins together!
(I still had one that wouldn't fit.)
Then I began gluing these stars on.

Ta-Da! 

I had one extra clothespin and one extra star.
So now I have a fancy chip bag clip too! :)

**In retrospect, I should have spray-painted the clothespins - it would have been much faster . . . but it also would have cost more $, since I didn't have spray-paint on hand!**

Wednesday, June 25, 2014

Cook + Craft | Summer Schedule

As a teacher, every year I am amazed when school starts back up at how quickly the summer went by. 
 The last two years I've made lists of "To-Do's" for my summer with my kids.  I usually put "big ideas/places to go" and things that we don't typically do within a given month.  **I've never used one of those detailed checklists (catch frogs, build a sandcastle, play hopscotch, eat Jell-O, stargaze...), but maybe I'll try that another summer!**
Some things on the list are free (visiting the metro-parks, summer reading program at the library, various community playgrounds, etc.) and some require a little bit of money (ice cream places, zoo, museums, etc.).  This has helped me try to fit in a variety of fun activities with my two little boys. 
It is inevitable though that August rolls around and I am rushing to fit in more than we even attempted to complete in July!

This year, I'm trying something new I saw on Pinterest (of course!), along with my usual "Idea List".  A blogger/mom from Somewhat Simple posted this Summer Schedule for Kids...which she apparently has used for the last 3 years! So it must work! :-)
It is a "weekly plan" layout, M-F, and you can fill in the blanks for an activity each day of the week. She shared her files of it on the website too, although I modified it for my use!

Her image and link:
http://www.somewhatsimple.com/summer-schedule-for-kids/


I used her image and added a weekly calendar, of sorts, for me to fill in...
My goal is not necessarily to "stick" to this Summer Schedule, but rather to not let my summer go by and I will be able to look back on it and say...."wow-we did a lot this year!"  :)

Already this past week, while I rearranged things, we did something each day!
If I can keep it up....goal accomplished! ;-)

Sunday, March 2, 2014

Craft | The Tractor Valentine's Box


My oldest is in his first year of preschool, which means that I am finally getting my chance at a perspective from the parent's side.  For the last 9 years, I've only been able to truly understand my side, as the teacher. 
It's definitely been fun.  Of course, I like school. 
I know that not every parent feels the same!
When Valentine's Day was approaching, Pinterest was my go-to!
What kind of Valentine's would we create for him to pass out?
What kind of collection box would we make?
What would we do for the party treat?
What would we make the teachers?
We started off with the most involved task.... the collection box.
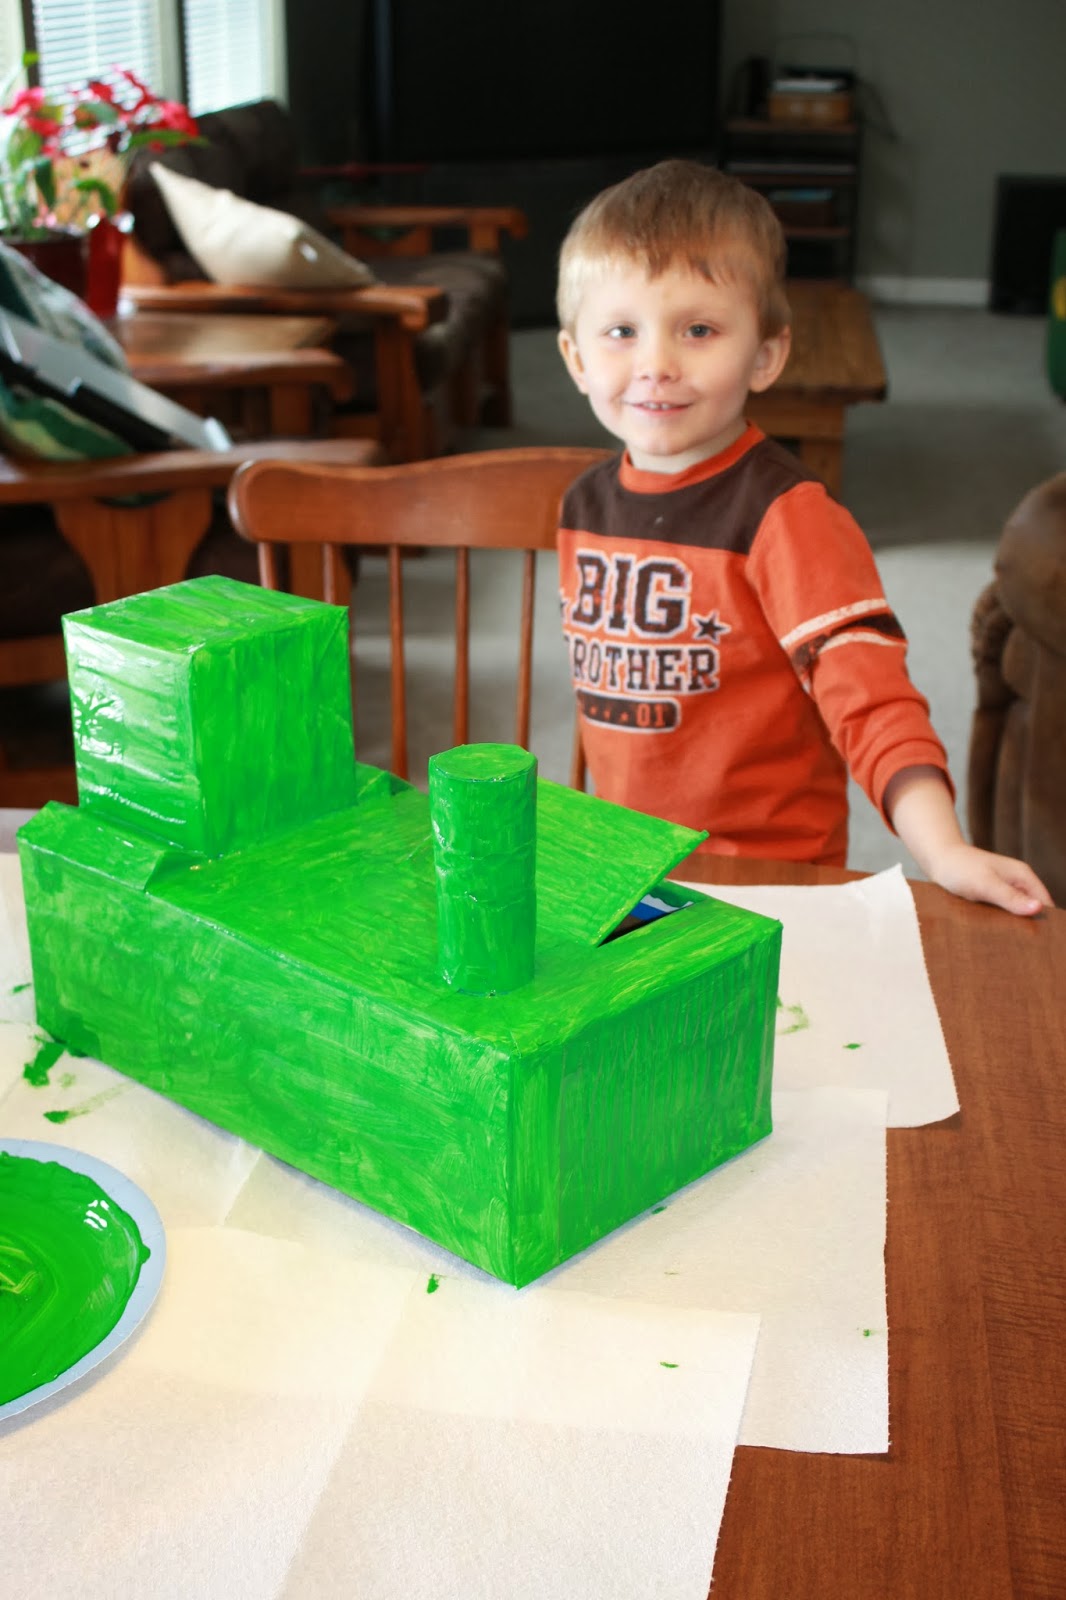
I strolled through various pictures on Pinterest with my son and being the tractor-loving child he is, he decided that he wanted to make a JD tractor ... just like his daddy's!

So I found an old shoebox for the base, and I had just gotten a little box in the mail that I thought would be perfect for the cab!
We used an empty toilet paper roll for the exhaust.
First, I taped them all together with duct tape and cut a flap for where the Valentines would go.
Then I covered it with white/copier paper.


All the while... the baby was destroying a BB&B flyer.


Finally came the fun for my preschooler...I let him paint away!
We started off with just green tempera paint, but it was pretty thin, so I mixed in some green acrylic to help cover it a little better.


It was a big job, and he asked for me to help him, but we got it done!
Later on, we put a second coat on, in order to cover it really well.


Even my hubby got involved and helped add the details and wheels
(because apparently, I didn't have the right colors when I started).

All done!
We took front, back, and side pictures and glued them on - with the runner-style, craft glue tape - so that it looked like he was driving the tractor:


It was a big hit!

Happy Valentine's Day!

Saturday, March 1, 2014

Cook | Slow-Cooker Angel Chicken

I'm always looking for new, good chicken recipes. 
Especially crockpot recipes (I'm a working mom!) 
My husband and I have a favorite passed down from his grandma (I'll post it later), and when I found a similar recipe on Pinterest with enough differences to make it "new", I had to try it!  
When I first checked it out on a cute blog called Cleverly Inspired, I found that I didn't have all the ingredients it called for ... but that didn't stop me. 
I made a few changes - which I'm always doing anyway - and decided it was a new, decent go-to! I've yet to try it exactly as originally posted, and I'm not sure I've ever made it the exact same way twice from my adapted recipe! 
(Doesn't surpass Grandma's Chicken & Rice, according to my husband, but still good!)

Slow-Cooker/Crockpot Angel Chicken

4-6 Frozen, Individual Chicken Breasts

2 6 to 8-oz Packages of Fresh, Quartered Mushrooms
          I typically use Baby Bellas or White Button.
         (I've often use canned, just because I have it on hand - but fresh does taste a better and they absorb the flavors of the soup mixes and wine!)

1/4 C Butter (half a stick)

1 2-oz Envelope of Onion Soup/Dip Mix

1 10.5-oz Can of French Onion Soup or Cream of Mushroom Soup or Golden Mushroom Soup
         (I've used all 3 with varied results; I've also used bigger cans with no problem!)

1 C White Wine
         (I've used Pinot Grigio, Cream Sherry Cooking Wine, Dry White Cooking Wine, Marsala...you can probably use whatever flavor you like, although I wouldn't go with super sweet!)

4-8 oz Cream Cheese
         (This amount just depends on how much I have left in my fridge...or how creamy you want it!)

Just before serving, cook rice or noodles...according to package directions
         (I've always used rice, and I don't use instant - anymore, and sometimes I add 1 C of the liquid that is in the crockpot to give the rice a little extra flavor but it not mandatory because you will use some of that liquid to pour over the rice and chicken when you serve anyway!)

Directions:

1) Place mushrooms and chicken in the crockpot.


2) In a skillet, melt the butter over medium heat.


3) Add the soup mix packet, canned soup, wine, and cream cheese (cut apart to help melt faster).


4) Whisk it all together until the cream cheese melts completely.


 5) Pour the mixture into the crockpot, over the mushrooms and chicken.


6) Put the lid on and cook on low all-day (my version of all-day is usually about 8&1/2 to 9 hours, because I don't have a crockpot that has a timer)...if you use chicken that is not frozen, you may want to consider cooking for 6-7 hours instead!  But honestly, as long as there is enough liquid in your recipe, I've never really noticed much change in the times.  
**Or you can also cook on high for half the time (3-4 hours)!

Let me know if this becomes one of your "regulars" too OR what changes you make!!